Building a Linux Media Network, one step at a time

Monday, January 30, 2006

Installing Debian

Installing DSL went fine, but I wanted to take a little side-track and setup Debian on Fulcrum (Via Epia SP800). I have a feeling that the drivers for the CN400 chipset, which can help out in the video decoding, will be better supported under Debian.

I thought that installing Debian without a CD would just take a similar sort of jiggery-pokery as installing DSL or SUSE from one partition to another. Unfortunately, the default Debian installer is hard-coded to look for a CD-ROM drive and will refuse to load its packages from anywhere else. Once I figured out the necessary steps, it was pretty straightforward:

  1. Download the "business card" network install CD
  2. RTFM: see sections 4.5 and 5.1.2 and 6.3.1.5 of Debian Install Guide
  3. In a clean partition, create /boot/newinstall. Copy vmlinuz and initrd.gz from here to /boot/newinstall. Copy businesscard.iso from step one to /boot.
  4. Add new entry to GRUB configuration:

    title New Install
    kernel (hd0,3)/boot/newinstall/vmlinuz root=/dev/ram0 ramdisk_size=12000
    initrd (hd0,3)/boot/newinstall/initrd.gz

  5. Accept all defaults in installer.

Thursday, January 26, 2006

Installing DSL

At this point, Fulcrum is running a LiveCD version of Damn Small Linux 2.0. Creating an actual hard disk installation is pretty easy. When DSL boots to the desktop, right-click on any blank space and select Apps>Tools>Install to Hard Drive. Specify the target partition, in this case, hda3.

It asks a few other questions that are irrelevant for our purposes. I disabled multi-user logins and enabled the ext3 filesystem. I said no when it offered to configure GRUB, just because I'm not sure how nicely it will play with the boot loader we already configured. So after the install, I went into the menu.lst file I'd already set up and added a new entry:

###dsl-2.0###
title Damn Small Linux 2.0
root (hd0,2)
kernel /boot/linux24 root=/dev/hda3 quiet vga=794 noacpi noapm nodma noscsi frugal

The entire menu.lst file is available here. It contains two entries, one for the LiveCD and one for the proper install.

Wednesday, January 25, 2006

Changing the Hostname

The DSL Wiki has a thorough article about how to permanently change a machine's hostname. It's the last two steps, the mailname and the knoppix-specific stuff, that I was unaware of. Note that a different page on that Wiki suggests using the boot parameter "host=" or "dslhost=" to set the host name. That don't work, at least not in 2.0.

Tuesday, January 24, 2006

Linux is Beefy

I'm not sure if the aphorism "Linux is Beefy" means anything outside of Cray Canada. BEFE is the post code we use to indicate that the kernel is up and running, that the boot sequence is effectively complete. I've just reached this point with Fulcrum. Herewith, a description of how it got there.

I've picked Damn Small Linux as the distro for this machine. It's a compact, full-featured distribution that I've had some good luck with so far. As a LiveCD - a "self-sufficient" CD that can be used to boot a computer - it fits into 50Mb. As an installed operating system, I believe it can squeeze into around 200Mb.

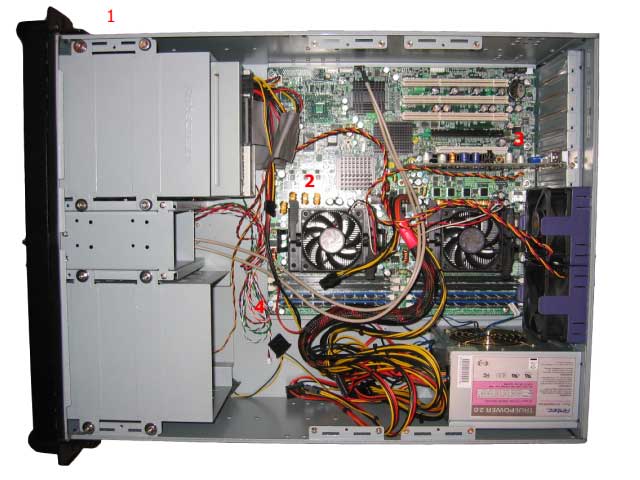
Now, I don't have a spare CD drive to hook up to Fulcrum, and even if I did, the tricky route is a lot more interesting and educational. Fortunately, I have a Linux workstation to help with the task.

The first step is to get the hard disk into a system where I can lay out and format the partitions just the way I want them. So I plugged the drive into my desktop PC, which runs SUSE 10.0 and had a free IDE channel.

I used the parted utility to create three primary partitions. The first was 1GB and the second and third were 2GB each. The first partition will be used to hold the images for the boot loader (1GB is way, way too much here, but it doesn't really matter). The second partition will hold the LiveCD ISO and the third partition will hold the actual installation.

Installing the boot loader was a little harder than it should have been. First, I created three mount points for the partitions and mounted them:


mkdir /mnt/fulcrum
mkdir /mnt/fulcrum/grub
mkdir /mnt/fulcrum/iso
mkdir /mnt/fulcrum/os
mount /dev/hdc1 /mnt/fulcrum/grub
mount /dev/hdc2 /mnt/fulcrum/iso
mount /dev/hdc3 /mnt/fulcrum/os


Then I ran the grub-install command to install the boot loader on the disk:

grub-install --root-directory=/mnt/fulcrum/grub /dev/hdc

Now, as far as I know, what this should do is install GRUB boot loader into the master boot record of the disk, and install all the extra GRUB data into the /dev/hdc1 partition. But I got an error message that looked a lot like a disk error when I tried that... something like "unable to read stage1 file".

Looking at the newly-created directory tree, it was pretty apparent that some files were missing from /mnt/fulcrum/grub/boot/grub. So I cleaned out the partition and just copied over the entire /boot directory into /mnt/fulcrum/grub. What this means is, I took SUSE's /boot directory and all the GRUB data it uses and cloned it for Fulcrum.

I tweaked the device.map file a little bit - it's fairly self-explanatory and pretty well documented online - and also added a fresh entry to boot the DSL LiveCD, which we're about to install. The new entry looks like this:

###dsl-2.0-live###
title Damn Small Linux 2.0 LiveCD
root (hd0,1)
kernel /boot/isolinux/linux24 root=/dev/hdb6 init=/etc/init lang=us vga=normal BOOT_IMAGE=knoppix
initrd /boot/isolinux/minirt24.gz

This tells GRUB to look in the 1'th partition for the Damn Small Linux kernel and initrd image. I believe GRUB numbers disks and partitions starting from 0, so this corresponds to the partition we called /dev/hdc2 above.

The last step is to actually get the Damn Small Linux LiveCD into that partition, which is empty right now. This is fairly straightforward. First, we mount the LiveCD iso (which I had downloaded earlier via BitTorrent from damnsmalllinux.org):

mkdir /tmp/dsl2
mount -o loop /usr/local/downloads/dsl-2.0.iso /tmp/dsl2

Then we copy the contents into the empty partition:

cp -R /tmp/dsl2/* /mnt/fulcrum/iso

And that's it! At this point I shut down my desktop PC, removed the hard drive, and connected it back to Fulcrum. DSL booted successfully and asked me a couple questions related to video and mouse configuration, and that was it.

So now what we have is a fake LiveCD distribution. It's running Linux, sure, but it's basically treating the hard drive as a read-only file system and making all its changes in a ramdisk. That's sub-optimal, because none of our configuration changes will be saved next time we reboot.

The next step is to install the operating system to that third partition we created and really get to work setting up this media center. After that, we can start to think about cutting over to the compact flash and getting rid of this hard disk entirely.

It Boots!

I just got Fulcrum (the client node) to boot. It would've been easier if I had a proper case rigged up for it. Since it's just sitting on a cheesy piece of plywood right now, I had to jumper pins 6 and 8 on the F_PANEL pin array. This is described on page 26 (actually page 34) of the manual.

The only trick is that these pins should be hooked up to a momentary contact switch - which makes sense. Think about the power button on your PC: you push it in, it pops right back out, and your PC starts to boot. So to simulate that behaviour without a switch, you just need to short the two pins briefly. I used a pair of needlenose pliers to push the jumper down and then immediately pull it off. Thanks to Brian for pointing this out.

Monday, January 23, 2006

The Hardware

As I mentioned in the intro, our little media network will initially have two nodes.

First, the server, which we shall christen "Backfire", because it is large, loud, and ungainly:

Wow. Okay, so the labelling didn't turn out so good. Anyways, these are some of the components:

  1. Antec 4U Rackmount (no, I don't have a rack in my house. But I have a sturdy shelf, and a large storage space under the stairs. It'll do, for now...)
  2. Dual Opteron 248's. This server is going to be doing a lot of stuff other than acting as a server for this project. These 64-bit processors ought to give it plenty of horsepower.
  3. The cheapest PCI-express video card I could find. This thing will be running headless, so I just needed the video card to get it set up. I believe it's an NVidia 6200.
  4. The motherboard, a Tyan Thunder K8WE (minus the SCSI controller). Stocked with 2Gb of PC3200 RAM, or 1Gb per processor.

This stuff isn't cheap - at least, not on my budget. But I got a sweet deal on the processors and the RAM, and the rest of the gear came to about $900CAD total. You could definitely save a few hundred bucks and go with a cheaper motherboard, for instance the ASUS K8N-DL. I went with the Tyan 'cause it's got a little more room for expandability. And the rackmount ... well, that's a bit of an extravagance. But I've always wanted a rackmount.

The first client in this network will be a Mini-ITX based PC, which we shall name "Fulcrum" because... well, because I like that name.


(Sharpie provided for scale)

  1. The centrepiece of this computer is the Via EPIA SP800 motherboard, an 800Mhz motherboard with onboard LAN, Video, TV-out, and sound in a 17cmx17cm form factor. I strongly recommend the folks at Logic Supply as a source for this part - they were great to me even when some trouble arose with shipping that was not at all their fault. The SP800 is currently the fastest fan-less motherboard Via makes. As I mentioned, one of the goals of this system is to have no moving parts.

    Another advantage to the SP800 is that it has some hardware built-in to help out with video and audio encoding/decoding. This means that the CPU doesn't have to busy itself with these tasks, and will be available to do other stuff while we're watching a movie or playing an MP3.

  2. Power is supplied to the board by a 60W DC-DC converter and a 12VDC power supply. This is the Morex 60W kit available from Logic Supply.

  3. 512 Mb of PC3200 RAM. Because I hope to construct a read-only file system (I'll get to that in a minute), it would be good to have as much RAM as possible. The SP800 supports up to 1Gb but I only had a 512Mb stick lying around.

  4. A Compact Flash/IDE adaptor. This is also available from Logic Supply (those guys are great, did I mention that?) The idea here is to load the operating system up onto a compact flash card and have the computer treat it just like a regular hard drive. But because compact flash only supports a limited number of write cycles (granted, a large number), we need to make it read-only.

  5. A hard drive cage, with a 6Gb hard drive inside. We'll use this disk to get everything set up, and only cut over to the compact flash at the last minute.

Well, that's what we've got to work with! Let's see how far we can get...

Introduction

This blog is an ongoing journal of my attempt to build a digital media network. The rough idea goes like this:

I will have a media server in my basement, located in a spot where it can make as much noise as it wants. This computer will host all my digital photos (roughly 3600 ~ 8Gb worth), all my movies (which, depending on compression, could easily break 1Tb), all my MP3's (about 20Gb), and any digital video I choose to capture (probably from a combination of cable TV and my in-laws' camcorder).

In addition to this, I will have at least one "client" computer, which will display media from the server. The primary requirement for this computer is that it be quiet. Secondary requirements are:
  • No moving parts (so I can leave it on all the time without wearing out fan bearings, drive motors, etc) - this obviously relates to the noise level.
  • Cheap! I want to put one of these in the living room, in the rec room, in the bedrooms, etc.

I expect there are a lot of people that would like to have a setup like this, so hopefully this site can become a useful resource. My contact info can be found in the "About" section that shows up on all pages; if you have any questions that aren't answered on the site please don't hesitate to ask.

Russ

Just getting started...

First post, just figuring stuff out. Finding my blog-legs, as it were.